- Garden Care
- 4,187
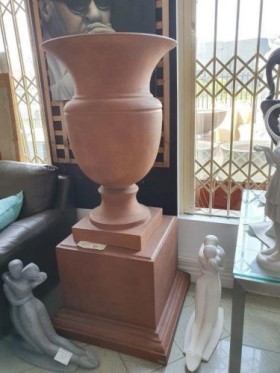
If you are looking for a fun and creative way to add a little extra flair to your garden, then making a DIY textured planter plinth might be the perfect project. With just a few simple tools and materials, you can easily create an eye-catching garden feature that will add a unique touch to any outdoor space.
Here at Garden Pie, we shall look into the steps to make a D.I.Y. textured planter plinth.
Table of contents [Show]
Materials and Tools required to paint your own textured planter plinth
Before you begin, you'll need to gather the right materials and tools. Here's what you'll need to make your own textured planter plinth:
Tools:
- Circular saw
- Drill
- Jig saw
- Sander
- Trowel
- Paint brush
- Measuring tape
- Level
Materials:
- Wood boards (preferably pressure-treated)
- Screws
- Cement board
- Tile adhesive
- Tile grout
- Outdoor tiles
- Outdoor sealant
- Paint
Steps to make a D.I.Y. textured planter plinth
Here are the steps to make your own DIY textured planter plinth:
- Gather Your Materials: To make a textured planter plinth, you'll need some plywood, exterior wood glue, screws, wood stain, a paintbrush, and a textured material of your choice. The textured material can be anything from river rocks to faux stones to mosaic tiles.
- Cut the Plywood: Start by measuring and cutting the plywood into the desired shape and size for your planter plinth. You can use a jigsaw, a circular saw, or a handsaw to make the cuts.
- Assemble the Pieces: Once the pieces are cut, use the wood glue and screws to assemble them. Make sure everything is securely attached.
- Stain the Plinth: Now it's time to stain the plinth. Use a paintbrush to apply the stain evenly, and let the stain dry completely before moving on.
- Add the Textured Material: Once the stain is dry, you can add the textured material of your choice. Make sure to use an exterior glue to adhere the material to the plinth.
- Seal the Plinth: Finally, you'll need to seal the plinth to protect it from the elements. You can use a sealer or a polyurethane finish. Apply the sealer according to the manufacturer's instructions and let it dry completely.
And that's it! Your DIY textured planter plinth is now ready to be used in your outdoor space. With minimal materials and some basic DIY skills, you can easily create a beautiful and unique planter plinth.
Conclusion
This guide covered the right steps to take when making a D.I.Y. textured planter plinth. When it comes to DIY projects, creating a textured planter plinth is one of the most rewarding and enjoyable projects to take on. Whether you're looking to create a unique planter for your backyard or a stylish accent piece for your home, this is a great way to spruce up any outdoor space.
Key points to note when making a D.I.Y. textured planter plinth includes:
- Choose the right materials: The material you choose for your DIY textured planter plinth will have a big impact on the overall look and feel of your project. Consider materials such as concrete, metal, wood, or even plastic. Each material has its own unique characteristics and benefits that you should consider before making a decision.
- Choose the right size: The size of your planter plinth should be based on the size of the plants you plan to use. It should be large enough to support them, but not so large that it takes away from the appeal of your project.
- Consider texture: Adding texture to your plinth can add a unique and stylish touch. You can do this by using different types of materials such as bricks, stones, or even tiles.
- Choose the right color: The right color can really bring your project to life. Consider colors that match the plants you plan to use, or opt for a more neutral color to blend in with your existing outdoor space.
- Consider the drainage: The last thing you want is for your plants to become waterlogged. Make sure to include some drainage holes or a drainage system in your design to ensure that the water can escape and your plants stay healthy.


